Content found in this wiki may not reflect official Church information. See Terms of Use for more information.
How to Web Scrape
Web Scrapping data from: https://www.speedtest.net/global-index/united-arab-emirates#mobile
- Download this chrome extension: https://chrome.google.com/webstore/detail/web-scraper-free-web-scra/jnhgnonknehpejjnehehllkliplmbmhn
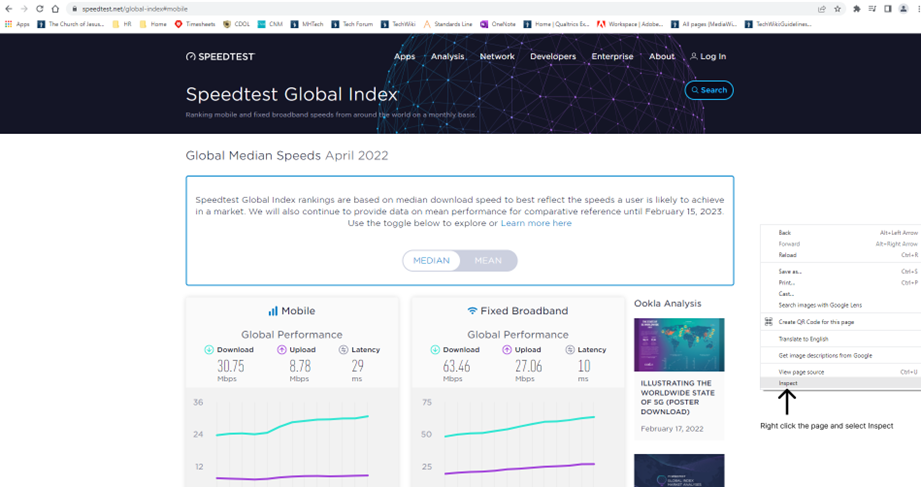
- Go to https://www.speedtest.net/global-index/united-arab-emirates#mobile
- Right click on page and select “Inspect”
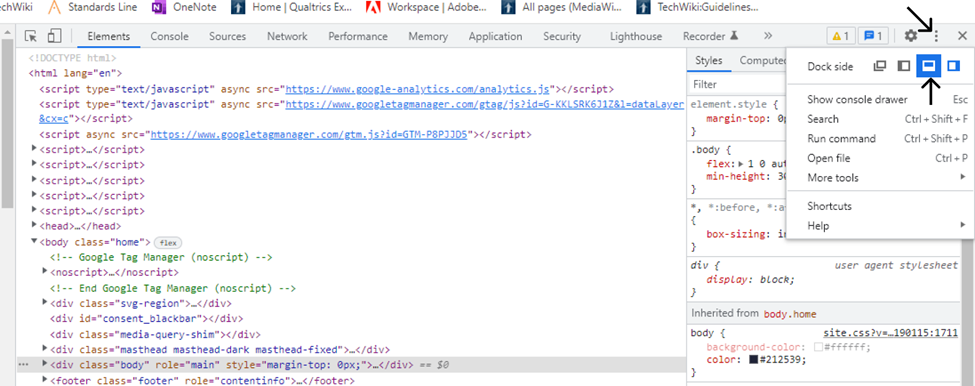
- Click the 3 dots on the top right and select the option that brings the inspect bar to the bottom
- Click on the “Web Scraper” tab
- Go to Create new sitemap. In the dop down, select “Create Sitemap”
- Change the sitemap name to “mobileData”
- Make sure to add the URL of the site.
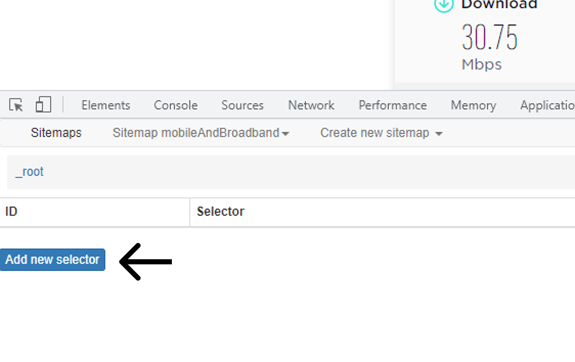
- Once you have created the Sitemap. Click on the site map. Then click on Add new selector
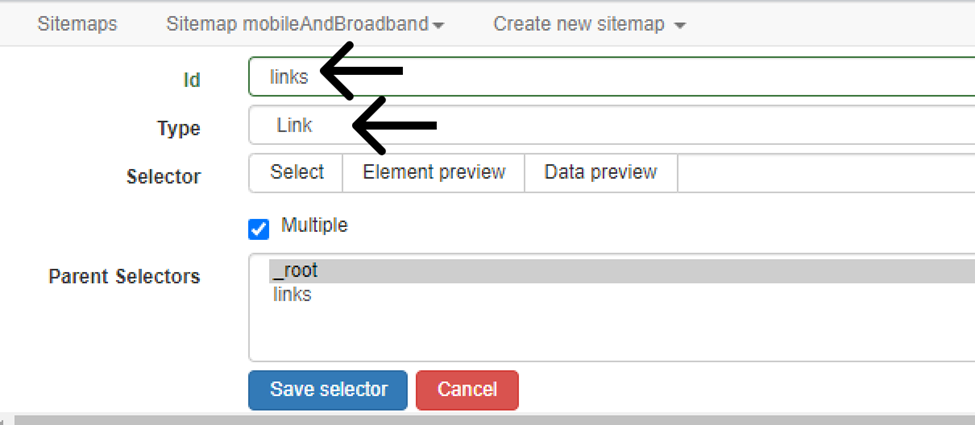
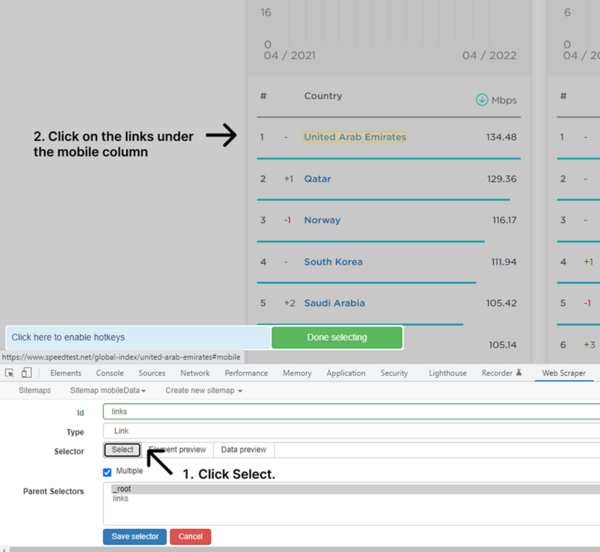
- Add an ID called links. This will go into each link to get the data
- Change Type to link
- Check the “Multiple” box
- Click Select. Now click on the link to a country (the link highlighted in yellow)
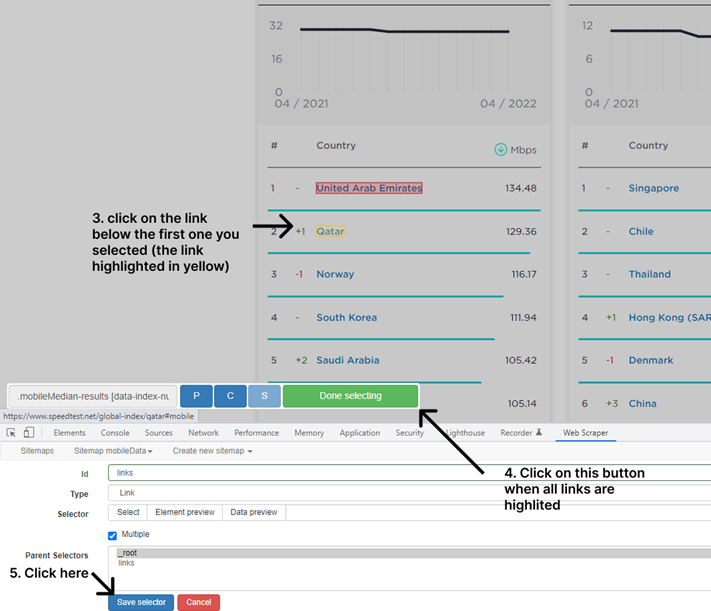
- Now click on the link below the first one you selected. (the link highlighted in yellow)
- once you selected the second link, the rest of the links in the mobile column should have been highlighted (the orange/red color). If not, keep selecting the links until it does.
- Once the links are selected, click the green button that says “Done selecting”.
- Then click the blue button that says “Save Selector”
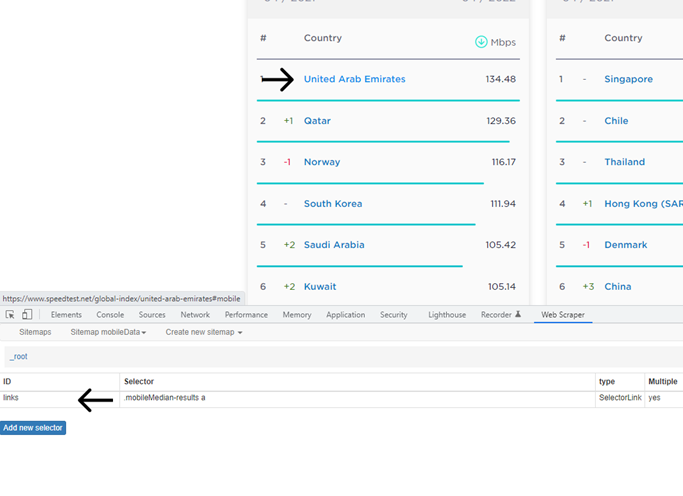
- Now click the first link to a country.
- After you do that, click “Links”
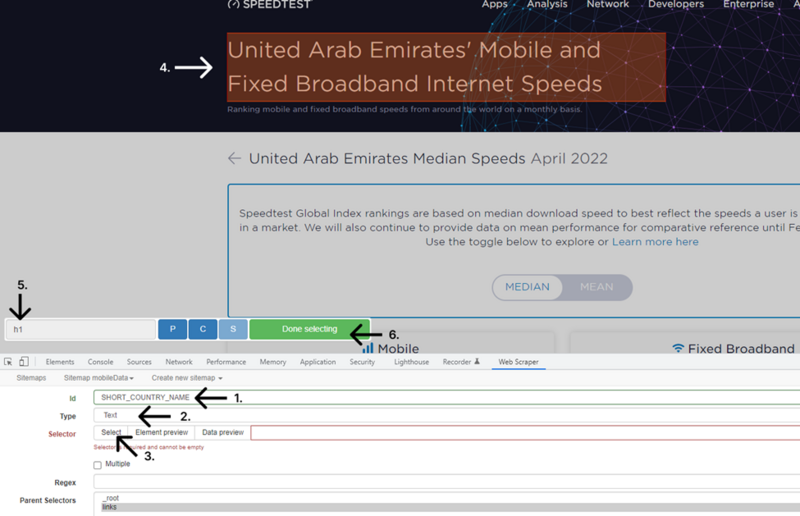
1. Change the Id to SHORT_COUNTRY_NAME
2. Make sure type is text
3. click “Select”
4. Select the highlighted part (red highlight)
5. make sure it says “h1” in the input.
6. click done
7. click the save at the bottom
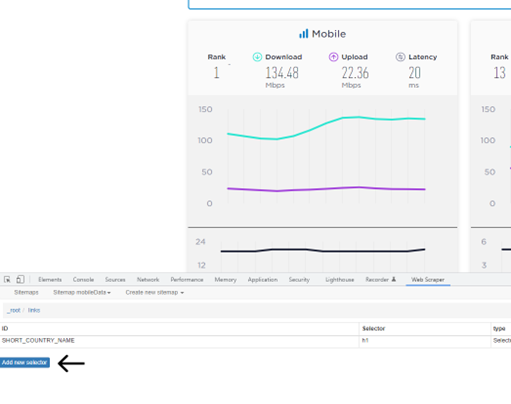
- Select “Add new selector”. These next steps will all be very similar.
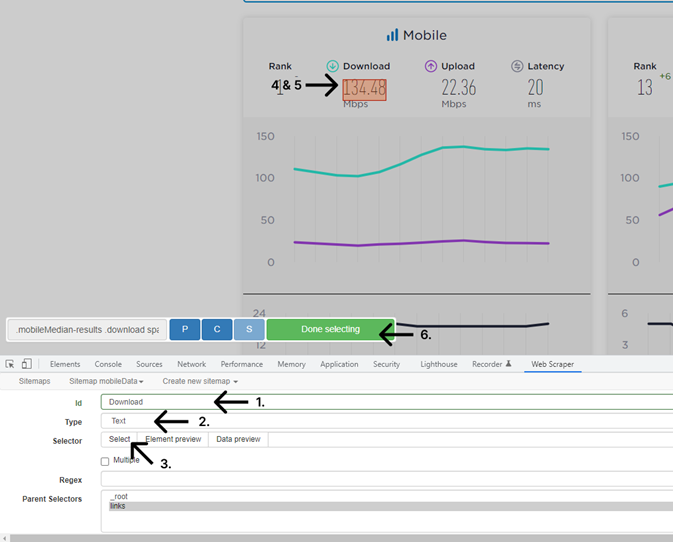
1. Change the Id to Download
2. Make sure type is text
3. click “Select”
4. Select the highlighted part (red highlight)
5. Make sure it is only the number that is highlighted
6. click done
7. click the save at the bottom
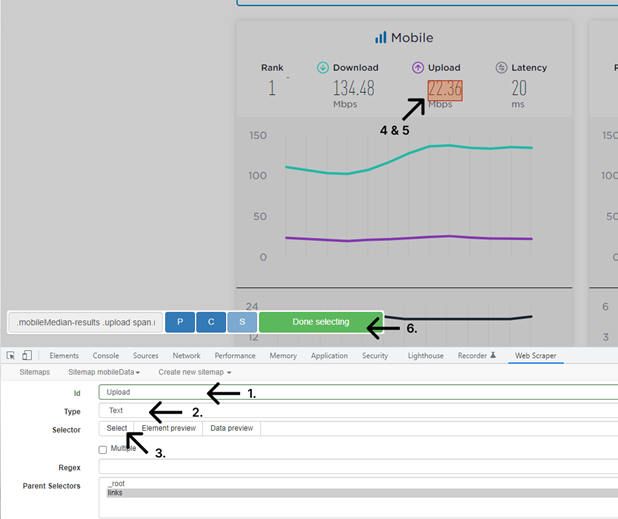
1. Change the Id to Upload
2. Make sure type is text
3. Click “Select”
4. Select the highlighted part (red highlight)
5. Make sure it is only the number that is highlighted
6. Click done
7. Click the save at the bottom
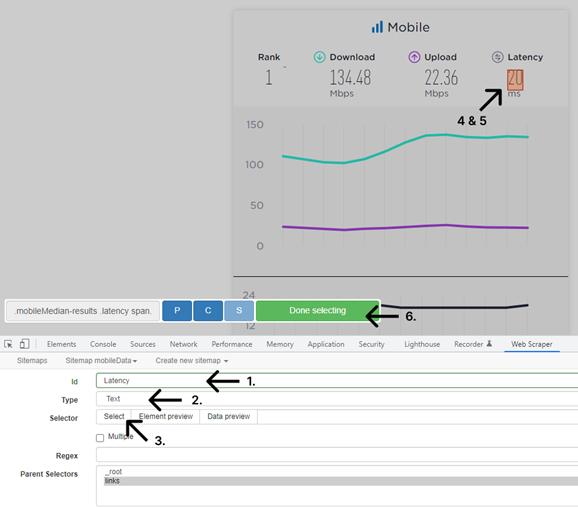
1. Change the Id to Latency
2. Make sure type is text
3. Click “Select”
4. Select the highlighted part (red highlight)
5. Make sure it is only the number that is highlighted
6. Click done
7. Click the save at the bottom
- Should look like this when you are done
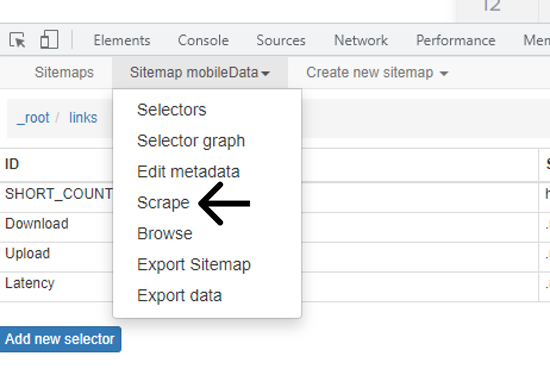
- Go to Sitemap mobileData. In the dropdown select “Scrape”
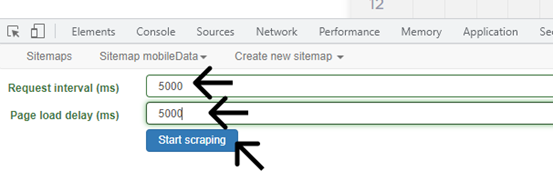
- Change both numbers to 5000
- Click Start scraping
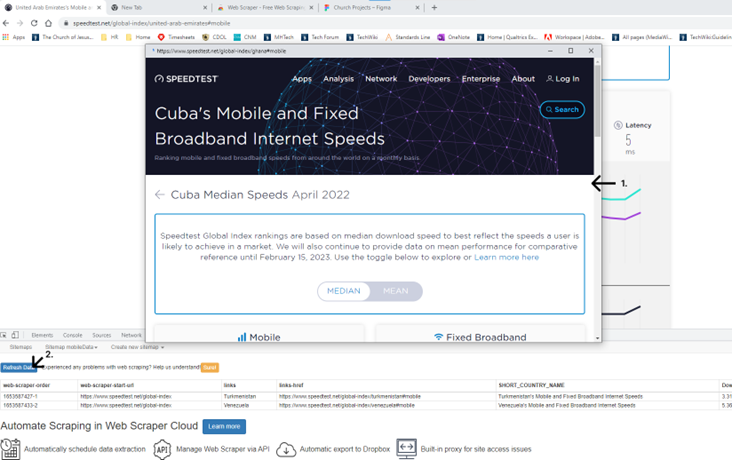
- The page will be gathering information in the background. Don’t exit out of this page.
- You can refresh the page and see what is being downloaded to the table.
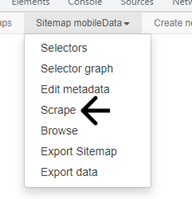
- Once everything is downloaded to the table, click on the Sitemap mobileData. In the drop down click on “Scrape.”
- Download as .XLSL or .CSV. I would recommend downloading the data as a .XLSX.
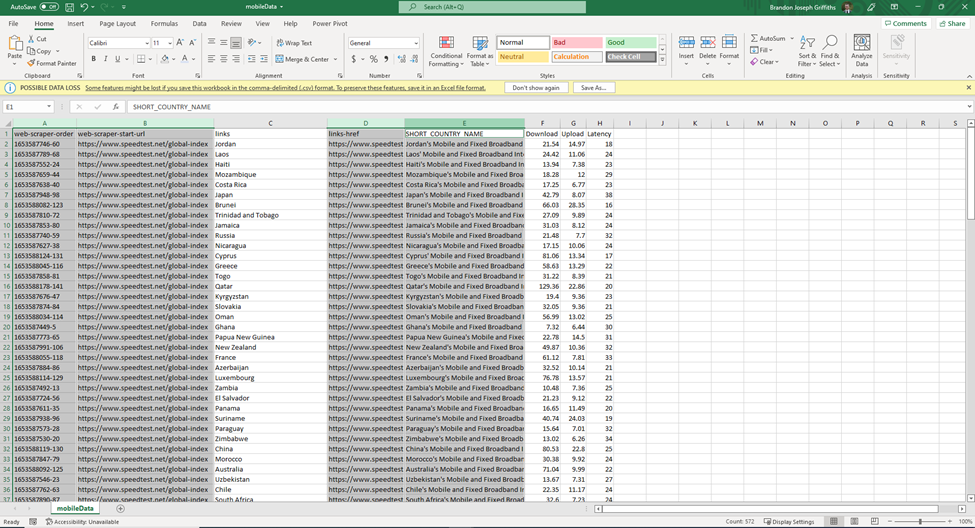
- Once the Excel file is loaded, delete the highlighted columns. You will be left with all of the data you need.
You can find additional information with the link below:
- Additional documentation: webscraper.io/documentation
